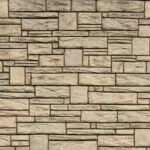
Removing old wallpaper can be a time-consuming task. Once you’ve peeled off the top layers, you’re often left with a sticky glue residue that seems impossible to get rid of. While scrubbing for hours with hot water and soap may work, it’s far from the most efficient method.
Luckily, there are some simple techniques if you don’t know how to remove wallpaper glue in 5 simple steps. With this guide by Land of Wallpaper, you can handle the most stubborn wallpaper glue. Here are five easy steps for removing wallpaper glue.
5 Simple Steps to Remove Wallpaper Glue
Step 1: Prepare the Walls
Before starting any cleaning, you need to prepare the walls for treatment. Take a sharp utility knife and lightly score the surface by scraping against the residual glue. This helps open up the glue and separate it from the drywall underneath.
Be sure to wear gloves for protection and work carefully to avoid damaging the drywall. Only apply light pressure as you score; you don’t need to dig deep. The purpose is simply to roughen up the glue residue and create grooves for the solvent to penetrate.
Scoring should be done vertically, horizontally, and diagonally across all the glued areas. This cross-hatch pattern ensures the entire surface area gets scored evenly. Work in three-foot square sections for the most thorough coverage.
Step 2: Apply Solvent
With the walls properly scored, you can now apply a chemical solvent designed to dissolve the glue. There are several common solvents used for wallpaper removal, including:
- Hot water – Hot water helps soften glue, especially for water-soluble adhesives. Bring a large pot of water to a boil and ladle it over sections of glue residue. The heat will open up the glue.
- Fabric softener – Add warm water and liquid fabric softener with a 50% ratio in a spray bottle. Mist it onto the glue and let it soak for 5-10 minutes. The softening agents break down the adhesive.
- Vinegar – Plain white vinegar is an effective solvent for many glues. Spray it on full strength or mix it with some warm water for lighter application. Let it sit before scrubbing.
- Chemical solvents – Products like Dif Gel are specifically designed to dissolve wallpaper adhesives. Apply a thick layer to each section and give it time to work.
No matter what solvent you use, thoroughly wet the glued surfaces and let them soak in for at least 5-10 minutes. This gives the solvent time to penetrate and loosen the glue’s grip. Reapply more as needed to keep the area wet.
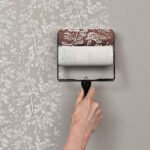
Step 3: Scrub Away the Glue
Once the glue has been softened, it’s time to start scrubbing it away. You’ll need a stiff bristle brush and some elbow grease for this part. Aim to scour off the top layers of residue first before moving to the deeper glue that’s left behind.
Scrubbing too early can just push the glue around rather than removing it. Make sure to let the solvents do their work before putting muscle into it. Warm water can help remove any dried or stubborn clumps as you scrub.
Apply moderate pressure as you scrub back and forth across the surface. Little by little, you’ll see the glue start to ball up and separate from the wall. Keep reapplying solvent and scrubbing until you get down to a relatively smooth layer of bare drywall.
For heavy glue buildup, you may need to apply a glue remover solution like Dif Gel before scrubbing. Chemical removers help chew through old or oil-based adhesives. Wear gloves when scrubbing with any chemical treatments.
Step 4: Rinse Away the Residue
As you scrub off the softened glue, there will be a lot of sticky residue left behind. This needs to be completely rinsed away to prevent re-depositing it back on the walls. Filling a bucket with clean water is the easiest method.
Make sure you have kept your brush in the water and continuously rinse it as you work on each section. Wipe the wall down with clean water as well to remove any lingering debris. For wall cavities or floor trim, use a wet sponge to rinse thoroughly.
You may need to change out the rinse water frequently since it will get dirty fast. Make sure to give every area of the wall a good wipe-down until the water runs clear. Scrape off any remaining chunks of glue by hand.
For spot treatment, a spray bottle with water works well to rinse small sections at a time. Just spray the wall and wipe it clean with a damp cloth until all traces of glue are gone. Thorough rinsing is key to getting a residue-free surface.
Step 5: Seal and Prime the Walls
Once the walls are clean and glue-free, there are two final steps: sealing and priming. After all the scoring, scrubbing, and rinsing, the drywall will look rough and worn in many places. Sealing helps reinforce it for a smooth finish.
Use a heavy-duty drywall sealer that penetrates deep into the surface. Apply a coat all over the walls and let it dry completely. The sealer binds everything together while also creating a moisture barrier to prevent the bubbling of new paint or wallpaper.
Lastly, apply a quality primer designed for walls and ceilings. This gives a fresh white base layer for painting or re-wallpapering. Tough stain-blocking primers are best since they prevent any leftover glue stains from bleeding through. Add two coats of primer for a perfectly prepped surface.
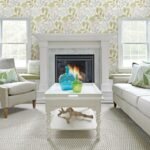
And that’s it! With these five simple steps to remove wallpaper glue, you can take on the most difficult wallpaper glue residue. Just be patient and persistent, keep reapplying solvents, and scrub thoroughly. Your walls will be revived and ready for refreshed decor.
Tips for Removing Wallpaper Glue
- Work in small sections for the best results
- Let solvents penetrate fully before scrubbing
- Use hot water to soften old or thick glue
- Wear gloves to protect hands from chemicals
- Rinse thoroughly to prevent residue buildup
- Seal and prime repaired surfaces before decorating
- Use stiff bristle scrub brushes for heavy glue
- Score walls carefully to avoid drywall damage
- Apply glue removers as needed for tough jobs
Final Words
Now you are familiar with how to remove wallpaper glue in 5 simple steps. Removing old wallpaper glue takes determination and elbow grease, but the results are worth it. With some basic tools and supplies, you can power through the messy prep work. Just follow these simple steps to strip away glue residue for smooth walls ready for your next design project.